Into the Light Design
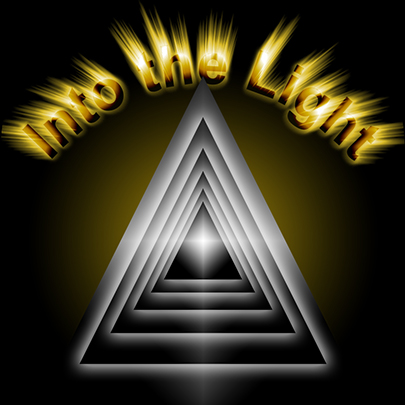
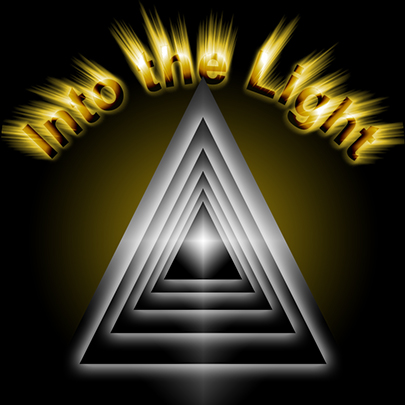
This will be the finished result:
_______________________________________________________
Open a new file 800 x 800, 72px resolution, transparent background
Create a new layer
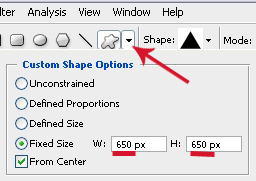
Select the Custom Shape Tool
Select Triangle
Set the Custom Shape Options as shown below:
Set foreground colour to black
Click once on the canvas for a black triangle
Select the Move Tool and place the triangle on the baseline of the canvas
*Duplicate the layer
Ctrl + T to transform the object
Set the Transform Controls at the top of the screen to width and height 75%:**
Repeat from * to ** until you have 6 triangles
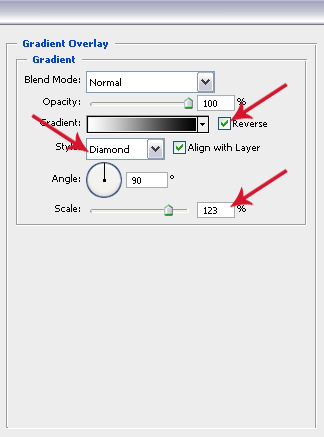
Double click on the largest triangle layer in the layers palette to bring up the blending options and apply the following Gradient Overlay settings:
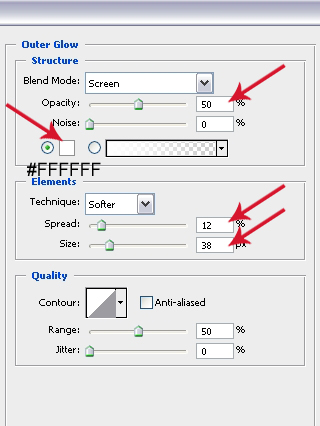
Double click on one of the other triangle layers to bring up the blending options and apply the above Gradient Overlay settings and the following Outer Glow settings:
Copy and paste the layer style to the other triangles (you should now have 5 triangles with gradient overlay and outer glow, and the largest triangle with gradient overlay only)
Turn off the visibility of the background layer
Right click on any visible layer and click Merge Visible
Create a new layer
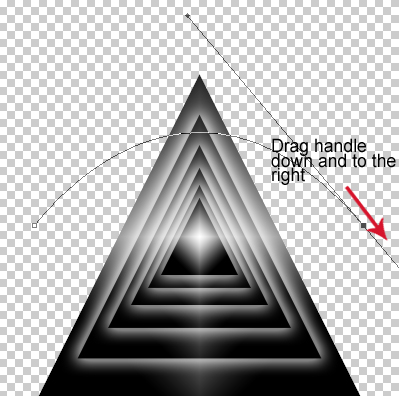
Select the Pen Tool with the following settings:
Create an arced line in the centre of your canvas as shown below:
Select the Text Tool and font of your choice (I used Arial Bold, 100pt), foreground colour black
Click the cursor in the centre of the arced path (make sure text alignment is set to centre) and type your required text
Right click on the layer in the layers palette and click Rasterize Type
Duplicate the layer
Set foreground colour to white
Working on the duplicate layer
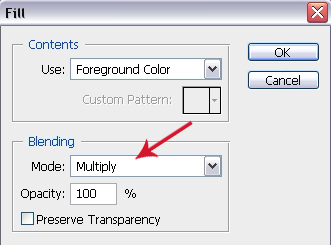
Edit>Fill – apply the following settings:
Filter>Blur>Gaussian Blur – set to 5, click OK
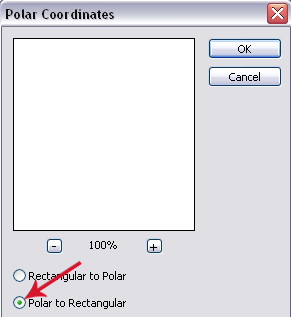
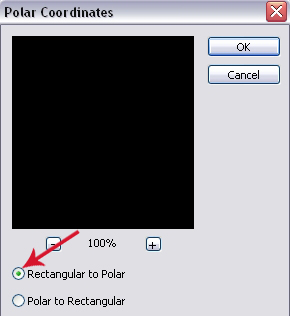
Filter>Distort>Polar Coordinates – apply the following settings:
Image>Rotate Canvas>90°CW
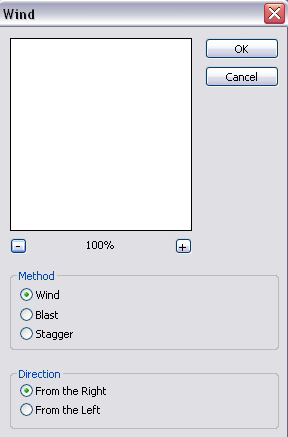
Filter>Stylize>Wind – apply the following settings:
Apply the wind filter again (no change in settings)
Image>Adjustments>Auto Levels
Image>Adjustments>Invert
Now apply the wind filter twice more – no change in settings
Image>Rotate Canvas>90°CCW
Filter>Distort>Polar Coordinates – apply the following settings:
Set the layer mode to Hard Light
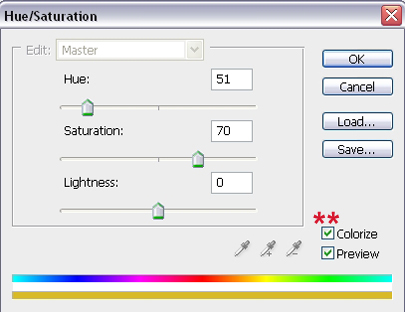
Image>Adjustments>Hue/Saturation – for the colour I have used, apply the following settings:
Right click on the layer in the layers palette and click Merge Down
Drag the layer down to just above the background layer
Fill the background layer with black
Using the Move Tool, move the text layer to just above the triangles
Create a new layer above the text layer
Set the foreground colour to orange #FBD20D
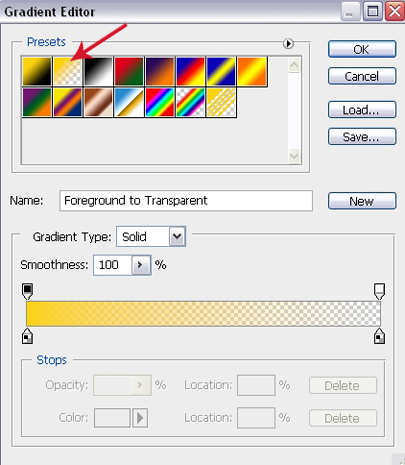
Select the Gradient Fill Tool and use the following settings:
Set to Radial Gradient, opacity 65%
Start in the centre of the diamond light in the middle of the triangles and drag the cursor to about halfway up the text – you should have a circle behind the triangles and close to but not touching the text.



April 15, 2010 at 6:22 am
I can’t make the text to follow an arced line. I did the arced line but the text went diagonal not circular.
May I know why?
Thank you
April 15, 2010 at 8:28 am
The first question is: Are you using Photoshop CS1 or above? If so, without actually seeing what you are doing I really can’t figure what is going wrong, therefore, here is a link to a Text on a Path tutorial: http://www.tutorialwiz.com/textonpath/ – hope that helps.