Photo to Painting
Resources:
Castle Image from sxc
Cloud Brushes by JavierZhX from deviantart.com
_____________________________________________________
This is the original and the final result:
______________________________________________________
Open the castle picture
Image>Image Size – set the width to 1000, auto height
Select>All
Edit>Copy
Open a new file 1000 x 667, 72px resolution
Edit>Paste
Image>Adjustments>Levels – apply the following settings:

Duplicate the layer
Image>Adjustments>Desaturate
Duplicate the layer
Image>Adjustments>Invert
Change the layer mode to Color Dodge – you will now see very little on the screen apart from white!
Filter>Blur>Gaussian Blur – set to 1.8, click OK
Hold down the shift key and select the top 2 layers
Right click, click on Merge Layers
Change the layer mode to Luminosity
Filter>Filter Gallery>Stylize>Glowing Edges – apply the following settings:

Click on the new effect layer at the bottom of the screen:

Brush Strokes>Angled Strokes – apply the following settings:

Create a new effect layer
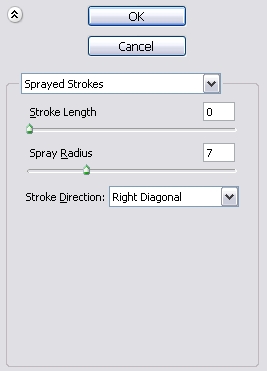
Brush Strokes>Sprayed Strokes – apply the following settings:

Click OK to accept the effect layers
Edit>Fade Filter Gallery – apply the following settings:

Select the Eraser tool, and a hard round brush and erase all of the sky area, including the white that extends beyond the outline of the castle and the grass
Select the original picture layer and duplicate it
Select the Brush tool and Cloud brushes
Set the foreground colour to brown #7F4909
Create a new layer
Place some different clouds over the whiter parts of the existing clouds:

Set the layer mode to Color Burn
Hold down the shift key and select this layer and the one below it
Right click and click Merge Layers
Filter>Filter Gallery – apply the following Dry Brush, Angled Strokes and Sprayed Strokes effect layers:

Edit>Fade Filter Gallery – set to 80%
Select the Eraser tool and a soft round brush and delete around the edges of the castle
Reduce the eraser opacity to 25% and with a large soft brush, brush over most of the yellow parts of the sky – erase again over the darker parts until you have the desired effect


Leave a comment